Let me start by saying that this is **my** version of building a small (approx 8'x8') floating deck.

Nothing fancy,
just a plain, sturdy deck for chilling on a lazy afternoon or a cool evening
(I will be adding a firepit area soon and a hammock).
The hardest part of this project was the
leveling of the foundation cinder blocks.
Out backyard is on a slope.
YAY!
I ended up using regular cinder blocks that we already had
(they usually cost around $1-1.50 each).
I bought 14 pre-treated 8' long deck boards, for a total of about $60.
I did ended up using some leftover material that was left from our recent sunroom and upper deck project.
So here is what I did.

I made sure each cinder block was leveled.
I either had to dug some soil and drop the cinder block partially in, or had to add height to it.
Here is how it looked like when the foundation was finished.

I made sure I had support on both ends and on the center.
Then I added the deck boards (without screwing it in yet) and made sure each one was leveled and square.

(again, if you are dealing with a flat surface to begin with, the floating deck building part will be a breeze).
At this point I added 3 supports boards at the bottom vertically.
This is where I used the screws to secure the vertical and the top horizontal deck boards.

I used deck screws (also leftover from previous projects), two on each board on the sides, and one on the middle support.
Like so pattern on each board
: . :

I also made sure in between the boards I left a little spacing to allow water to drain.

Also to keep in mind, it is better to keep the grain of the wood boards going down, like a "rainbow".

It should prevent the wood to warp "up" in the future, after being exposed to the elements for a while.
I added one board at the time, and pre drilled the holes, before adding the screws (this prevents the wood from splitting).

This part went pretty fast.
My dear husband decided to help me with the drill, since he is "better at it"...I am just glad he helped :)
 |
| - all those dots are from the bottom of my muddy shoes - |
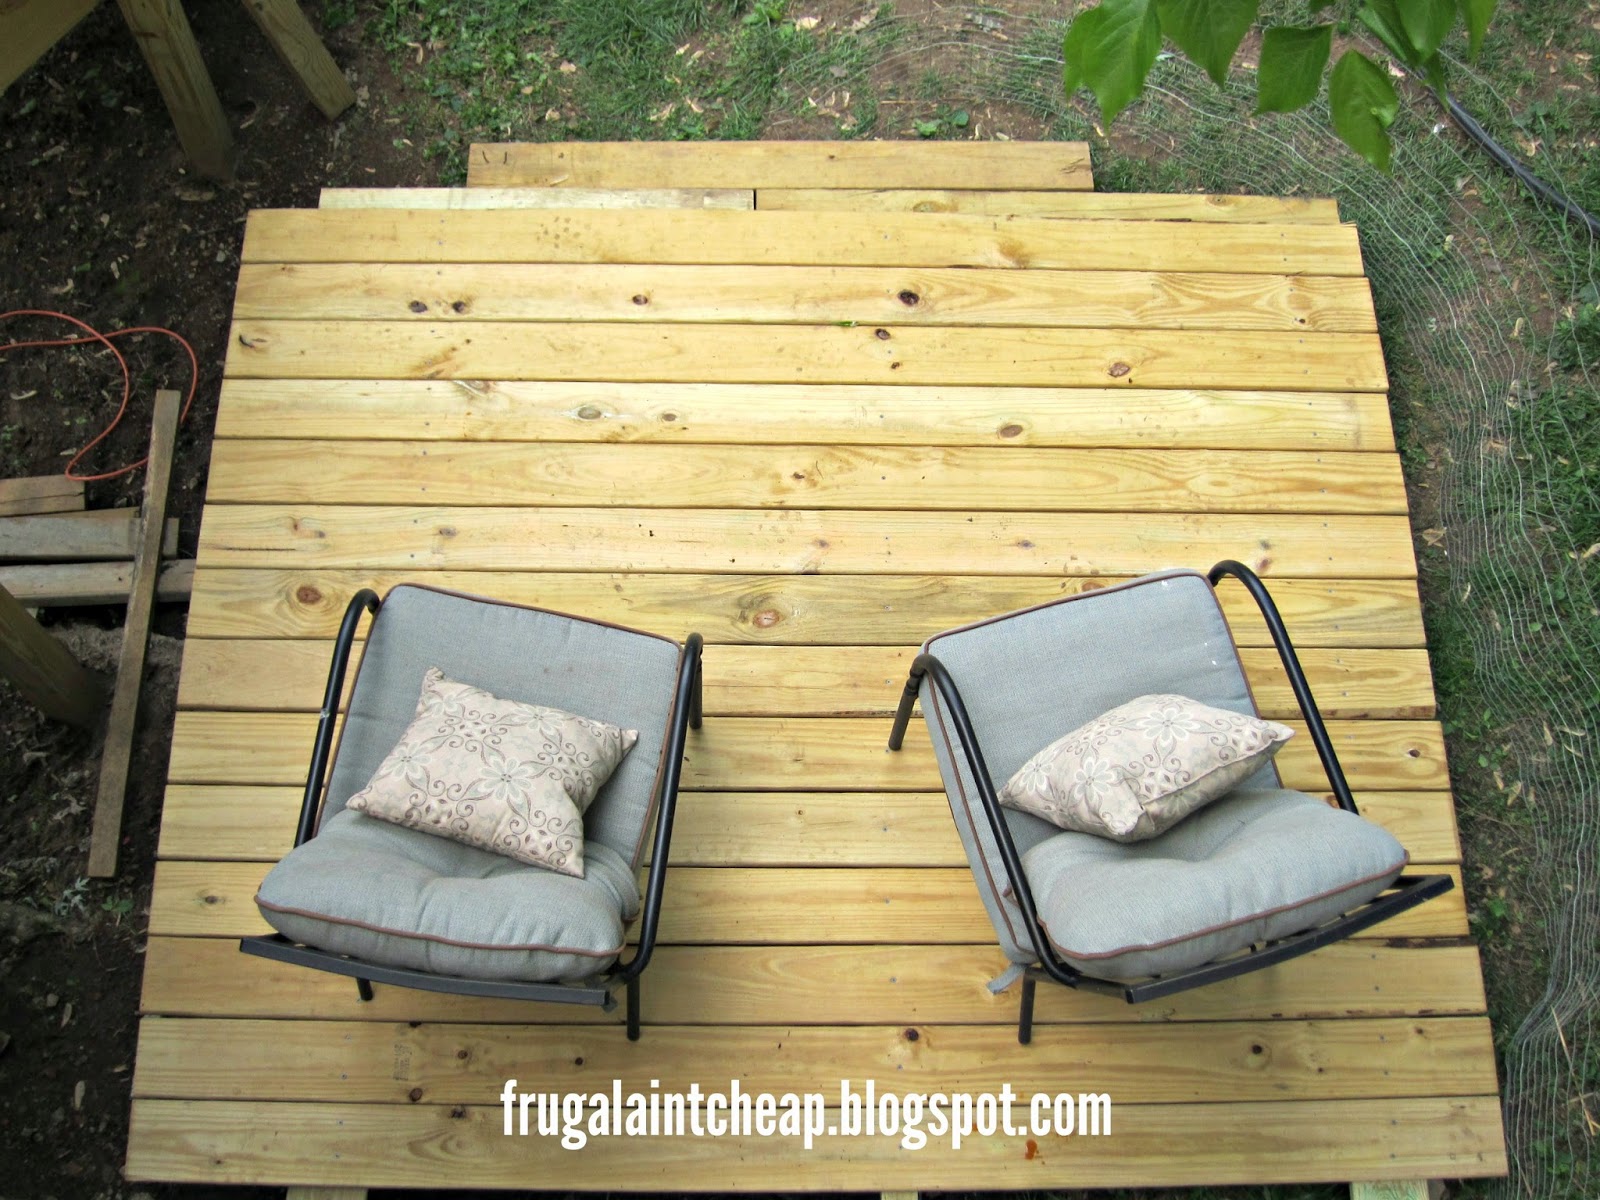
And here it is.
Looking down from the upper deck.
I added steps to it, by using leftovers 4x4 pillars' scraps.

I am now waiting for the pre-treated wood to really dry out good, and then sometime this summer, either stain or paint it.
(both upper and lower deck).
Not bad for a $60 investment,
and my first try at a floating deck.
Stay Frugal,
Daniela
***"Floating decks" are so called because, rather than being attached to a building as are standard decks, they're just "floating" free out there, all on their own. Not only are they easier to build than standard decks, but they're also less scary to build for DIY'ers. For the non-carpenter, removing your house’s siding is a pretty scary proposition. Let’s face it: Most of us take a “Leave well enough alone!” attitude towards our houses. We don’t want to mess up anything….(from about.com)***
Linking to
A stroll thru life
Savvy southern style
Linking to
A stroll thru life
Savvy southern style
20 comments:
Dearest Daniela,
Guess you tackled that slope in the best possible way you could and for such a bargain!
Good for you that your husband helped you drilling the holes.
When summer comes around this entire upper deck and lower deck area will be such a nice addition.
Hugs to you and enjoy the weekend; finally some REST!
Mariette
Ma sei veramente bravissima Daniela! Complimenti!
Buon weekend…
Un abbraccio, Mary
It came out great! xoxo My spouse is going to build one for the shed. There is already a brick patio in front of it. I'm sure it won't be easy!
What you can do is amazing! And now after all your hard work, you get to relax on a great deck!
It really did turn out great! You'll love it! Happy weekend!
Awesome job Daniela! I'm right now trying to decide on creating a floating deck or brick patio in my backyard. Thanks for the detailed instructions!
You did an awesome job, Daniela! It looks great! Now you can get a nice big glass of lemonade as well as a good book to read and sit back on one of those chairs and relax on your new deck! :)
Wow Dani, it looks beautiful!!!
Love it! I would love to do some sort of simple deck over our mostly gravel outdoor area. Hmm...
Amazing work! I never heard of the concept of a floating deck before. Added sitting space outdoors. You did a great job.
Wow Dani
I am so impressed. This is gorgeous and the cost is amazing. Great job. Just beautiful.
Kris
That deck turned out great! I bet you enjoy sitting out there now. I'm so impressed that you did that all by yourself.
Fantastic. We are putting in a "floating deck" as well this summer. I am so looking forward to all the possibilities that it will offer us for summer dining.
Great job as always!!
Wow what a great job you did and this turned out great!!! Can't wait to see the fire pit.
Cynthia
You are going to love this deck! I can just see you with the fire pit enjoying a gorgeous evening. Good job!
Very nice! Hope you get your hammock and firepit soon! You make it look pretty easy girl!
I wanna be you when I grow up.
-andi
It looks amazing!! How fun, it is perfect for summer nights, you are going to love it! You are so awesome Daniela!
I need to try this. You make it look so easy.
I am thinking of trying this but my hubby needs convincing. How has it held up for you? What issues have you encountered since building it? Thanks! janetarn@gmail.com
Post a Comment